
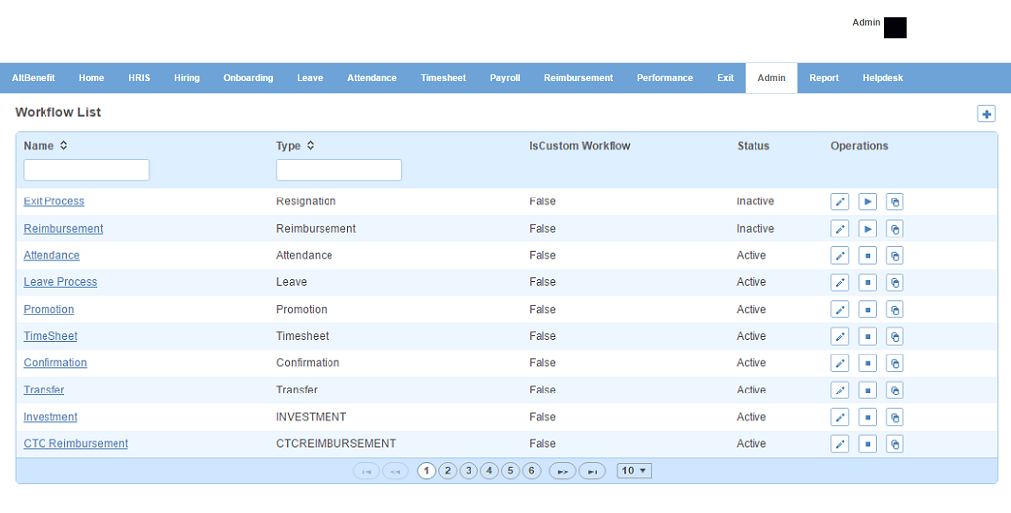
Workflow page displays the list of workflows. You can filter the list on the basis of name and type.
How to create a workflow?
1. Click + icon on the top right. Following page will open.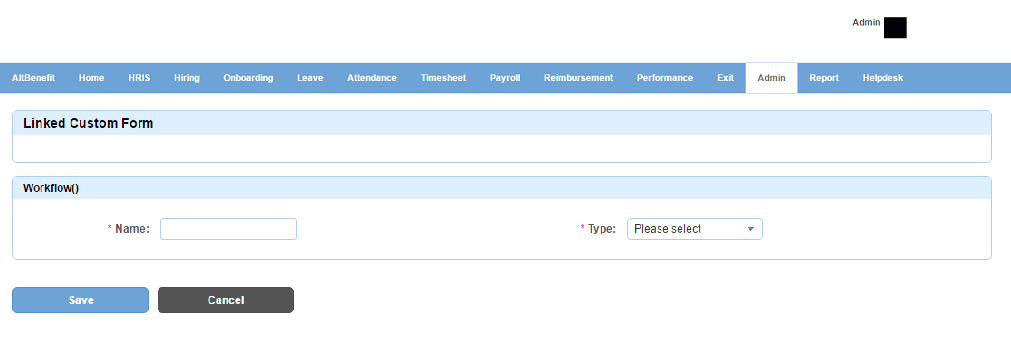
2. Enter name and select type of workflow from the drop down. Workflow type is a module or module item for which the workflow will be created.
3. Click Save button. A new workflow will be created and added to the workflows list.
How to add a stage to workflow?
1. Click edit(pencil) icon. Following page will open.
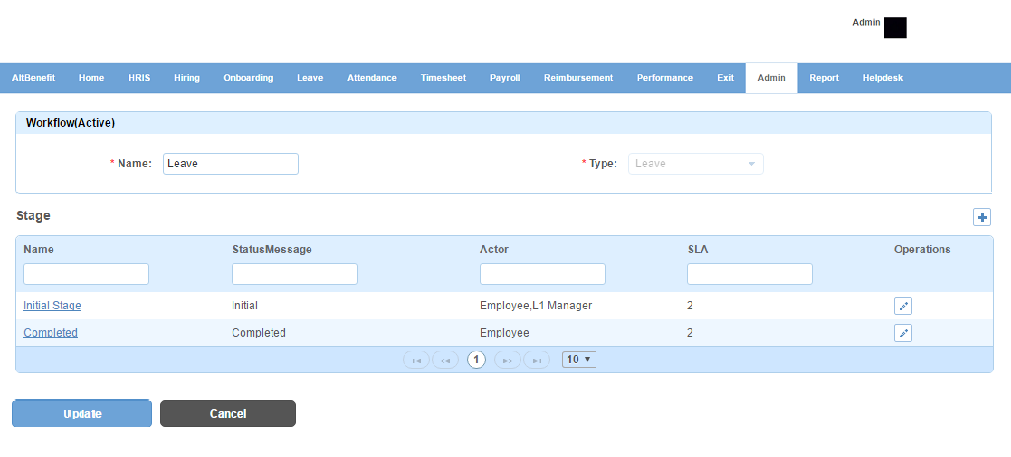
Note: By default, two stages Initial Stage and Complete Stage will be created and added to workflow.
2. Click + icon on the top right. Following page will open.
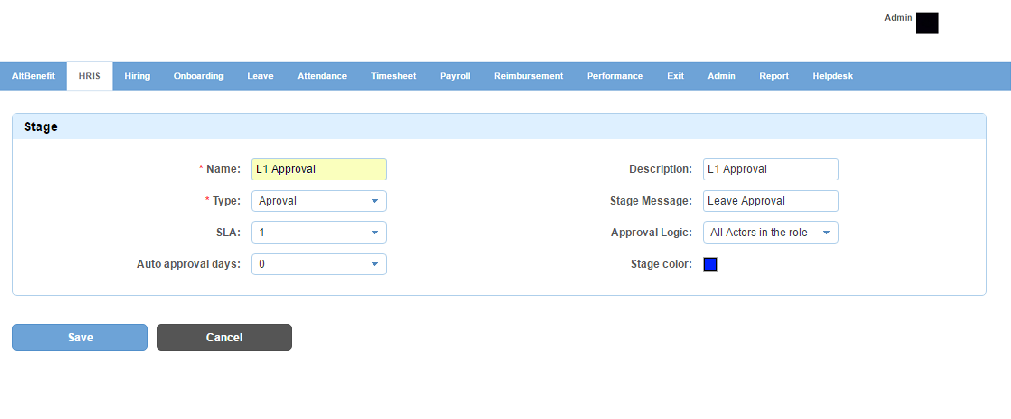
Field Level Description
| Name | name of stage. |
| Description | description of stage. |
| Type | list of type of stage. The options displayed are predefined depending on the workflow type. You can choose one. |
| Stage Message | message which will be displayed under Stage column in the Tasks list. |
| SLA | Service Level Agreement. This is the number of days for mails to be sent linked to any stage till the task is pending at the stage. |
| Approval Logic | list of approval logics. This logic indicates whether the stage will be approved by all actors in the role or any actor in the role. You can choose one. |
| Auto approval days | list of number of days. This will automatically approve the request if the manager has not taken action after the number of days entered. You can choose one. |
| Stage color | stage name will be displayed in this color in Alt Worklife. |
2. Enter the required information.
3. Click Save button. A stage will be created and added to the stages list.
How to edit a stage?
1. Click edit(pencil) icon. Following page will open.
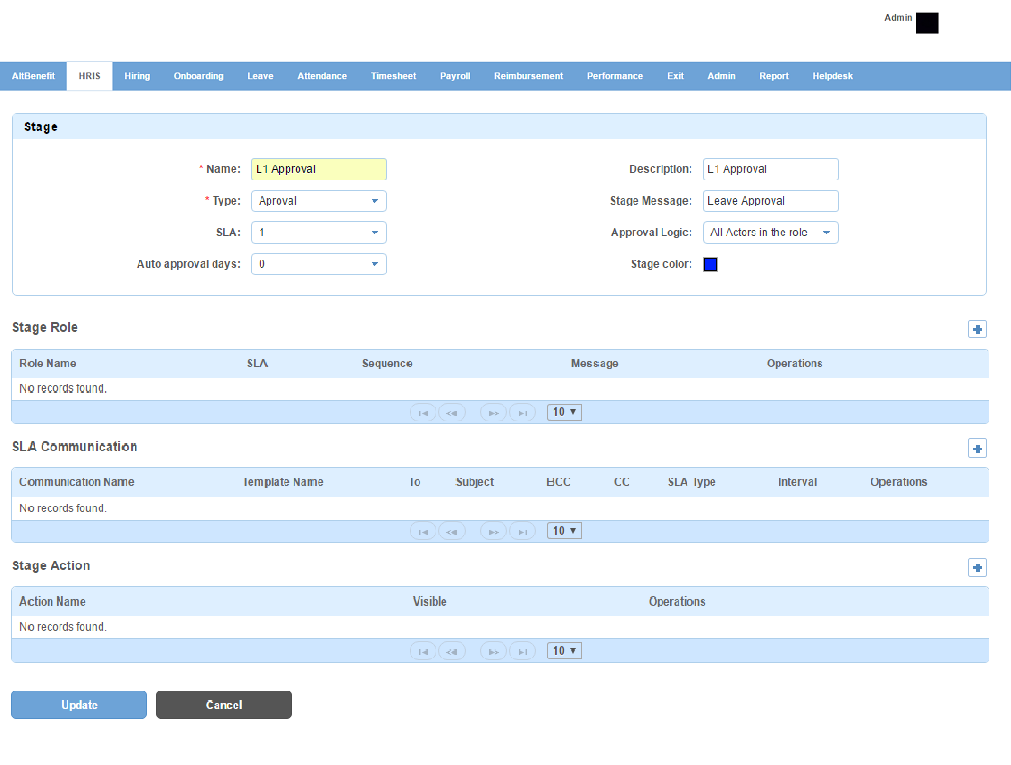
Note: There will be three sections under which information needs to be added, namely, Stage Role, SLA Communication and Stage Action.
2. Click + icon on the right against the Stage Role section name. Following pop up window will open.
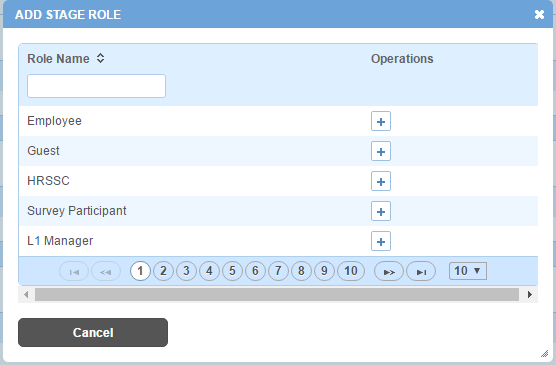
3. Click + icon. Role will be added to the Stage Role section.

4. Click + icon on the right against the Stage Role section name to add more Roles. Repeat step 3.
5. Click + icon on the right against the SLA Communication section name. Following pop up will open.
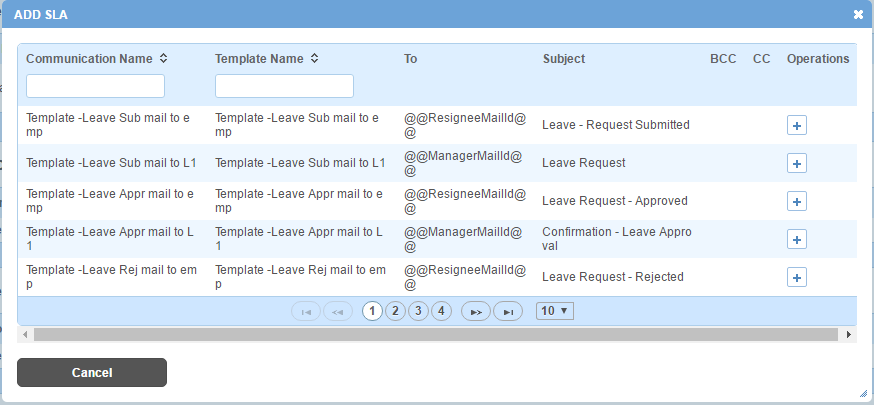
6. Click + icon. Mail Templates will be added to the SLA Communication section.

7. Select SLA Type from the drop down as Stage to bind the Communication mail with the Stage.
8. Select Interval from the drop down to select the number of days (interval) after which the mail will be triggered.
9. Click on icon on the right against the SLA Communication section name to add more Mail Templates. Repeat steps 7 to 8.
10. Click + icon on the right against the Stage Action section name. Following page will open.

11. Select Action Type from the drop down, depending on the Action to be performed at that Stage.
12. Enter Action Name. Action Name will be the text displayed on the button.
13. Check Is Visible check box to make the action button visible for this Stage in Alt Worklife.
14. Select Transition Type from the drop down, e.g. getRosteredEmpLeaveApproval. List of Transition Rules associated with that Transition Type will be displayed, out of which one will satisfy the condition and will be executed.
15. Select Next Stage from the drop down. The task will be moved this Stage after completion of current Stage.
16. Enter message in UserAlertMessage textbox. This message will be displayed to the user when this button will be clicked or this Action will be performed.
17. Enter message in From Message textbox for the request sent when this Action button is clicked.
18. Enter message in To Message textbox for the response sent or the message displayed to the person who has to perform action on next stage.
19. Click Save button. Stage Action will be created and added to the Stage Action section.
20. Click edit(pencil) icon.
21. Click Add/View Notification icon to select the mails for communication on click of that action button. Following section will be added to the page.
![]()
22. Click + icon on the right against Transition Communication section name. Following pop up window will open.
![]()
Note: Only list of mail templates attached to that Transition Type will be displayed.
23. Click + icon. Transition communication mail template will be added to Transition Communication section.
![]()
25. Click Update button.
26. Click + icon on the right against the Stage Action section name to add more Stage Actions. Repeat steps 11 to 25.
27. Click Update button to update the stage successfully.
Impact in Alt Worklife
A Leave workflow has been created with Initiate, L1 Approval and Complete stages. When employee creates a leave request under Leave > New Leave (Initiate stage), parameters(Action button, Submit) will be displayed as set at Leave workflow level. Also, at L1 Approval stage, leave will be displayed to his L1 Manager under Home > My Tasks as per the parameters set at Leave workflow level. Likewise at Complete stage, leave will be displayed under Leave > My Leaves and parameters (Stage Message, Stage Color) will be displayed as set at Leave workflow level. Notifications will be sent depending on the mailer linked to these stages.